Window Management

Exploring Windows 10: Window Management Part 4

This is Part 4 of my tiny series on Window Management in Windows 10.  While you’re welcome to review the previous parts, its not a prerequisite to follow along.

Part 1

Part 2

Part 3

In Part 3 I mentioned some nifty things about the WINDOWS Logo key + TAB key combination, but I [intentionaly] didn’t tell you that it was the shortcut for Task View.

Task View

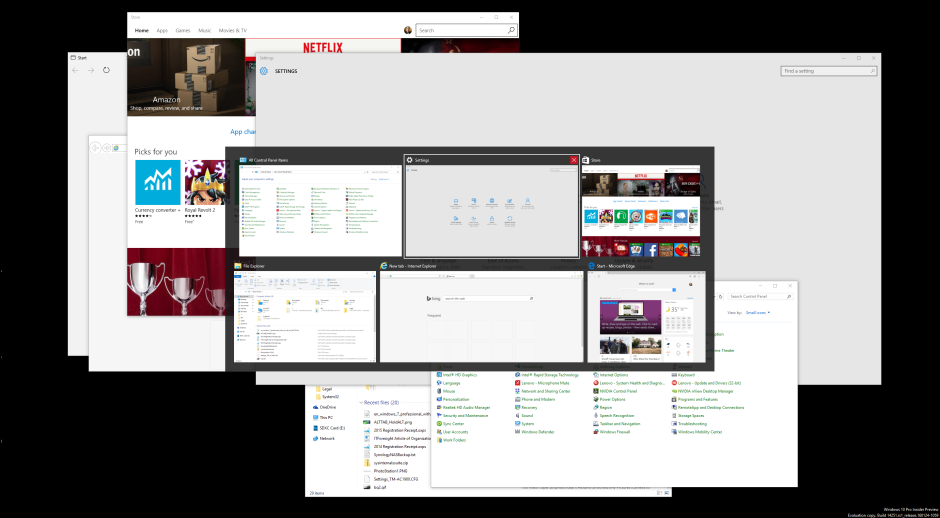
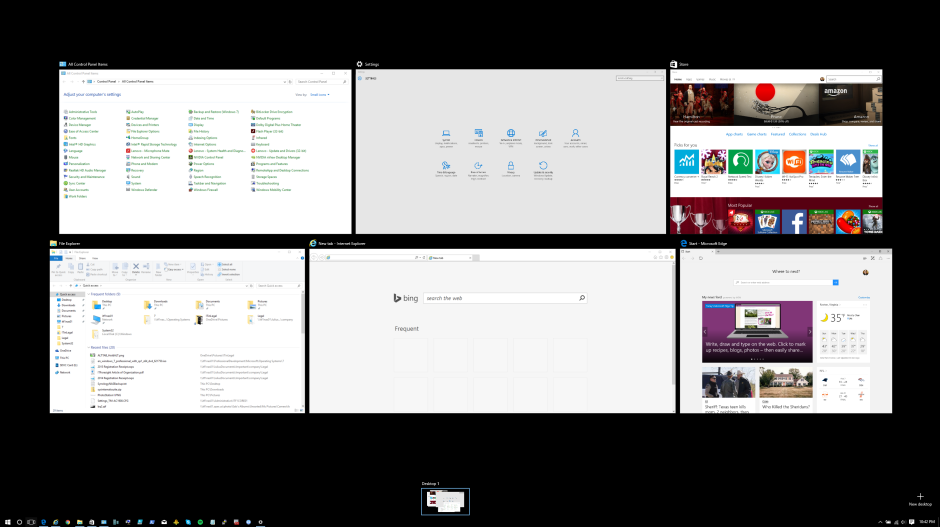
Task View is the first pinned icon on your Taskbar after the Cortana search box, and aside from being able to see and manage all of your open windows in the Task View, you can also create new, and manage existing, Virtual Desktops.

Yes!  Virtual.  Desktops.  (^_^) !!!!1!  I would argument that this is likely to be the single most interesting desktop feature by far.

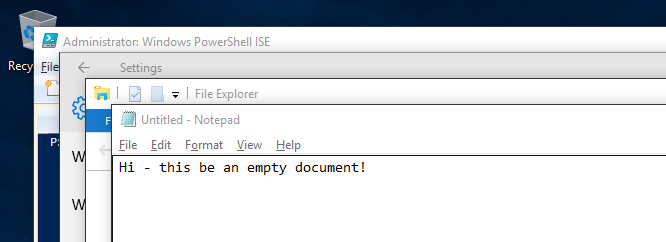
Each virtual desktop has its own set of apps, while retaining all the shortcuts and wallpaper from the original.  Furthermore, everything on the original desktop continues to function (music, videos, apps etc.) so you’re not ‘suspending’ the original desktop.  The idea behind this is that you would group applications into virtual desktops to help eliminate too much application/window clutter.

Once you create your new virtual desktop, you can drag windows/applications from desktop to desktop via the Task View to help get organized.

When you close a virtual desktop, the windows/applications don’t close, so there’s no fear of losing anything.  Instead, the windows/applications are pushed over to the desktop to the left of the desktop you’re closing.

There are several shortcuts available to facilitate the creation of these virtual desktops.

Keyboard Shortcuts from the Desktop

  • WINDOWS Logo Key + TAB – Opens Task View to show all of your open applications AND all of your virtual desktops.
  • WINDOWS Logo Key + CTRL + D – Create a new virtual desktop
  • WINDOWS Logo Key + CTRL + Left/Right – Scroll through your desktops left/right
  • WINDOWS Logo Key + CTRL + F4- Close the current virtual desktop


Keyboard Shortcuts from Task View

  • WINDOWS Logo Key + TAB – Go back to the desktop. (Also, you could just press ESC)
  • WINDOWS Logo Key + CTRL + D – Create a new virtual desktop and switch it while remaining in Task View
  • WINDOWS Logo Key + CTRL + Left/Right – Scroll through your desktops left/right while remaining in Task View
  • WINDOWS Logo Key + CTRL + F4- Close the current virtual desktop while remaining in Task View

Bravo to Microsoft to making Windows not only ‘cool’ but also practical.

Well that’s for now on Task View.  I fully encourage you to explore it on your own as you migrate or continue to explore to Windows 10.

Good Providence to you!

Exploring Windows 10: Window Management Part 3

This is Part 3 of my tiny series on Window Management in Windows 10.  While you’re welcome to review the previous parts, its not a prerequisite to follow along.

Part 1

Part 2

ALT + TAB

For decades now, ALT + TAB has been the tried and true window switcher, and like many other familiar features in Windows 10, it’s still here in Windows 10 but has learned a few new tricks.

  • Press ALT + TAB together once but release TAB while continuing to hold ALT to see all the windows open and get a live view of the open windows.  So if you’re watching a YouTube video, you’ll see it playing there in the ALT + TAB window.

ALTTAB_HoldALT

  • You can switch to the window using the keyboard:
    • While still holding ALT, press TAB to cycle forward.  Release ALT to ‘select’ that window.
    • While still holding ALT, hold SHIFT and press TAB to cycle backwards.  Release ALT to ‘select’ that window.
  • You can also switch to a window via the mouse:
    • While still holding ALT, use your mouse to select the window of your choice.
  • You can also close windows via the mouse:
    • While still holding ALT, when you hover over the window a small X will appear which you can click to close the window.
    • If you keep holding ALT after closing the window, the ALT + TAB menu will remain on screen to either close more windows or switch to the application in question.

Some very nice updates.

WINDOWS Key + TAB

Pushing this key combination once will give you a live tiled view of all the open windows.  You can switch to a window via arrow keys or mouse or even close the window from there.

WINDOWSTAB

Interesting tidbits related this feature:

  • This key combination was first introduced in Windows Vista as ‘Windows Flip 3D’, was accessible via both the ‘Switch Between Windows’ button on the taskbar or via CTRL + WINDOWS Logo Key + TAB that.
    It would show you the open windows in a rolodex-style animation.
  • In Windows 7 the feature remained but was renamed to ‘Aero Flip 3D’, and although the taskbar icon was removed (but could still be found if you looked hard enough!) it was accessible via two keyboard shortcuts:
    • CTRL + WINDOWS Logo Key + TAB – This puts you into the Flip 3D view allowing you to cycle between windows via the arrow keys and mouse scroll wheel.
    • WINDOWS Logo Key + TAB – This mimics the behavior of ALT + TAB. Continue holding the WINDOWS Logo Key to keep the view up and navigate accordingly.


ALT + ESC

This is a new one to me although has been around for a while.

To instantly switch between applications you can you could use ALT + ESC, foregoing all the pomp & frill of the ALT + TAB or WINDOWS Logo Key + TAB key combinations

Stay tuned for the next set of features!


Good Providence to you!

Exploring Windows 10: Window Management Part 2

In Part 1 we mainly focused on Snap & Snap Assist.  Today I’m going to show you some other ways to arrange windows.  Now, I’m not suggesting these features are new, but since we’re on the subject of ‘window management’ I thought it was appropriate to add this in the event you weren’t aware of these features.

Managing Windows via the Taskbar

If you right click the Taskbar in Windows 10 you’ll find 6 handy window management options, although they don’t all appear at the same time.

Taskbar-WindowManagement-Small

  • Cascade windows: Puts windows in a single stack that has been fanned out so that the window titles appear.

CascadeWindows

  • Show windows stacked: Puts windows in one or more horizontal stacks depending on how many windows you have open and whether the window can be re-sized. (We covered this above.)
  • Show windows side by side: Puts windows in one or more vertical stacks depending on how many windows you have open and whether the window can be re-sized. (We covered this above.)
  • Show the desktop: Minimizes all open windows revealing your desktop.
    The keyboard shortcut is WINDOWS Logo Key + D
    There’s even a discreet invisible button at the absolute end of the Taskbar that does this for you and I’m willing to bet you’ll be hard pressed to find it.
    I’m hovering over it in one of these images. Do you see it?

Seriously, the difference is its incredibly subtle – I’m not playing any tricks here:

ShowDesktopTaskbarButton-SidebySide

Bottom image shows the button ‘highlighted’.


So you click the invisible button to the right of the date & time, immediately after that vertical bar, and as if by magic your desktop disappears and reappears.

  • Show open windows: This – which only appears after you’ve used the ‘Show the desktop’ option above – will restore all the open windows in their original positions prior to showing the desktop.

ShowOpenWindows

The keyboard shortcut is WINDOWS Logo Key + D
And you can also use the “invisible button” at the end of the Taskbar to do this.

Another neat option is ‘Show desktop peek‘ which is disabled by default. All this really does is allow you to take a quick peek at your desktop without minimizing all the windows. You’ll need to enable this by checking the ‘Use Peek to preview the desktop when you move your mouse to the Show desktop button at the end of the taskbar‘ option in ‘Taskbar and Start Menu Properties’.

TaskbarAndStartMenuProperties-UsePeekPreview

Once checked, when you hover over the ‘invisible button’ at the tail end of the Taskbar, it will give you a ‘peek’ at your desktop.

DesktopPeek

The translucent rectangles on-screen are visual cues of real windows that are open. This is a great way to know you’re ‘peeking’ at your desktop.

Bonus Round: Managing Windows via Task Manager

The very humble, but extremely powerful, Task Manager has a handful of very useful window management options via the ‘Applications’ tab.

In Windows 7, open Task Manager and you have 2 methods for managing windows:

Method 1:

  • While in the Applications tab
  • Select 1 or more applications
  • Secondary mouse click
  • Select an option:
    • Minimize
    • Maximize
    • Cascade
    • Tile Horizontally
    • Tile Vertically

Method 2:

  • While in the Applications tab
  • Select 1 or more applications
  • Click the Windows menu
  • Select an option:
    • Minimize
    • Maximize
    • Cascade
    • Tile Horizontally
    • Tile Vertically


You might be thinking “Wait a second, I thought this was a post on Windows 10?
You’re absolutely right and I’m only mentioning this because the ‘Applications’ tab was removed in Windows 8 meaning those two methods above are no longer available, which may seem like a regression.

In Windows 10, there are only a few window management features in Task Manager, and I won’t cover them in depth because they’ve basically been covered elsewhere. (Plus its really not that exciting.)

In Windows 10’s Task Manager, go to the ‘Processes’ tab, right click on the application to reveal some of the features mentioned above.  In certain cases you’ll need to expand the app in question to reveal the Window in question before you get that right-click menu.

Windows10TaskManagerWindowManagement

I really hope you found this second part of our series on windows management in Windows 10 series useful.

Good Providence to you!